Lightweight Video, Heavy Impact: How to Compress Without Losing Quality
So what’s the magic key? It’s simple: File size should be part of your creative process, not an afterthought or something you think about later. In a world where every extra second matters, smaller files mean more chances for someone to watch your work all the way through.
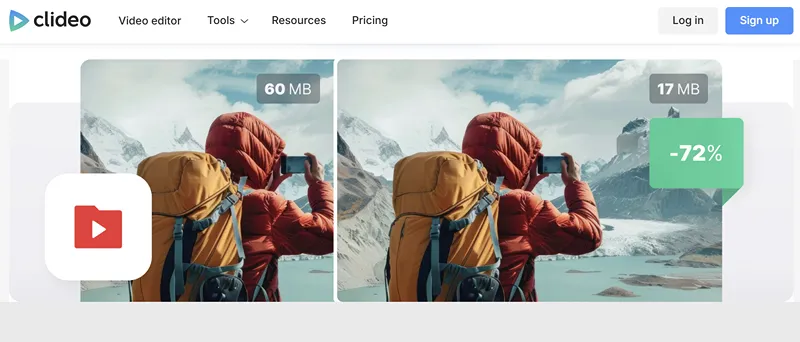
I rely on simple tools and clear targets to make this work. A seemingly small reduction in file size can make a big difference in speed and experience without compromising on quality. I often use the Clideo Video Compressor because it is user-friendly while also consistently delivering the results I want.
Speed Should Be Part of the Plan (From the Start)
Audiences do not wait. With mobile phones and catchy formats like reels and shorts, attention spans have drastically reduced, and patience is rare.
If your video is large, the platform will slow it down, the network will struggle, and your audience will click away. This is why it’s crucial to think about speed right from the beginning.
Ask yourself how quickly a video can reach your viewer’s timeline, starting from the moment you upload it. Odds are, you want it to get there as soon as possible. And to achieve that, make wise decisions on length, transitions, overlays, and even the music you choose.
Here’s a good rule of thumb: Aim for a meaningful but safe reduction. Try cutting the file size by 25 to 40% while keeping the moments that matter most. You don’t need perfection. What you need is a smooth start, a clear middle, and a clean finish. Most viewers will forgive small compromises as long as your message is clear.
Bitrate, Resolution And Audio
There is no single magic setting, but below are a few helpful principles:
- Bitrate controls file weight: If you reduce the bitrate intelligently, your file will reduce without ruining the quality. Static shots and talking heads can handle heavier compression than fast motion or particle effects.
- Resolution should fit the context: Keep clips native to the platform you’re posting them on. Vertical reels, screen recordings, and tutorials often look better at a slightly lower resolution with a higher bitrate, focusing on sharp text.
- Audio matters more than you think: Even a lovely visual becomes cheap when the audio is tinny or distorted. A clear and steady audio can keep viewers engaged, even if the visuals are a bit compressed.
- A quick mental model helps (a lot): Decide what you want to stay focused and clear. Faces, type, brand marks, and fast cuts deserve more data. Static backgrounds, gradients, and long shots can be compressed. When you start thinking from such a selective mentality, you’re more likely to compress files with intention as opposed to fear.
A Practical Compression Workflow
Here is a simple playbook you can use for most short to mid-length projects:
- Set a target size: Choose a file size that suits your platform and audience. For a two-minute explainer, you can aim for under 80 to 120 MB.
- Trim non-essential frames: Cut dead air, long fades, and redundant overlays. Removing ten seconds can shave 10% of the file size even before any compression.
- Export a clean master: Keep a high-quality copy for your archive and re-edits. You will thank yourself later.
- Create a delivery version: Compress the master by 25 to 40%. Preview motion-heavy shots and text screens before you finalise them.
- Check it once on a phone: If it looks good on a small screen, it will be amazing on a big one. Pay attention to skin tones, subtitles, and thin lines.
- Publish and measure: Track completion rates and early drop-offs. If viewers leave in the first five seconds, our tio is to try a smaller file and use a punchier start.
This workflow is not perfect, but it is something you can use repeatedly and consistently achieve results. Consistency is better than chasing perfection with every update.
Publishing Faster Without Losing Quality
If you think of delivering as an art, you may get more out of the same work.
- Keep your intros short: Start with an actionable or a bold claim, not a lengthy title card that consumes bandwidth and time.
- Use native aspect ratios: Avoid letterboxing and extra padding that wastes pixels.
- Simplify effects: Heavy grain, complex transitions, and stacked filters make compression harder. Save such effects for key moments rather than overusing.
- Make subtitles clear and crisp: Burn-in captions should be large, high-contrast, and checked after compression to ensure they remain crisp and visible.
- Build presets: Once you find a formula that works for vertical reels, live streams, course modules, or ads, save the settings so your next export is just a click away.
Creators often worry that shrinking files equals shrinking quality. The truth is that smarter files travel further. A viewer who actually finishes your video receives more value than someone who abandons a heavy file halfway. And the viewer who stays till the end is also more valuable to you.
The Habit That Pays Off
There’s no single hack to lightweight videomaking. It is a habit that you build over time. Faster uploads mean more iterations.
Smaller files make collaboration easier. Lower bounce rates improve platform visibility, allowing more people to see your work. With time, this adds up to more reach and better results.
The best part is how accessible this is now. You can plan, trim, compress, subtitle, and publish from your phone on a bus or while waiting in a coffee line. If you want an easy and all-in-one solution to make truly lightweight videos on an iPhone, here is a handy link to Clideo Video Editor on the App Store: https://apps.apple.com/us/app/clideo-video-editor/id1552262611